Table of Contents
Creating a certificate signing request
If you are using Linux, you can generate a certificate request using the "openssl" command via a terminal.
1. First of all, prepare a location on your computer where you will store the certificate request created in the following steps, for this we recommend creating the directory "bapcrt". Navigate to this directory and generate the certificate request using the "openssl" command:
openssl req -out request.csr -utf8 -new -newkey rsa:2048 -nodes -keyout certificate.key -subj "/GN=Vardas/SN=Pavarde/CN=Vardas Pavarde" -reqexts SAN -config <(cat /etc/ssl/openssl.cnf <(printf "\n[SAN]\nsubjectAltName=email:el.pastas@pastas.lt"))2. Check available files:
ls -ltotal 8-rwxrwxrwx 1 root root 1704 May 7 15:37 certificate.key-rwxrwxrwx 1 root root 980 May 7 15:37 request.csrCertificate download and installation
1. If you have not used the BAP system before and do not have the possibility to log in via the Electronic Government Gateway, please send the prepared "request.csr" file by email to the customs office when requested. You will receive a reply with the sertifikatas.crt file, which you should save in the "bapcrt" directory you created.
If you can log in to BAP using the authentication service provided by the Electronic Government Gateway, or if you have already used the BAP system in the past and you are able to login to it, click on the "+Add New" button in the "Profile" section, select the value "Certificate issued by the customs of the Republic of Lithuania - for connecting to customs portals and accessing customs system to system services." in the "Adding a new certificate" modal window, then click on the "Continue" button.
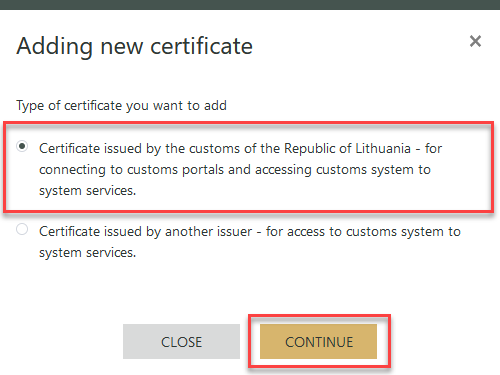
Picture 1. "Customs of Lithuania for authentication" selection
2. Bookmark the file "request.csr" in the "Generate Certificate" window and click on the "Generate Certificate" button.
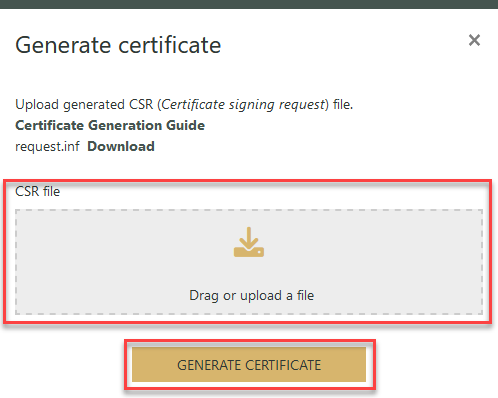
Picture 2. Uploading the CSR file
3. Download the "sertifikatas.crt" file by clicking the "Download" button in the pop-up window or in the certificate data table. Move the downloaded file to the "BAP certificate" directory.
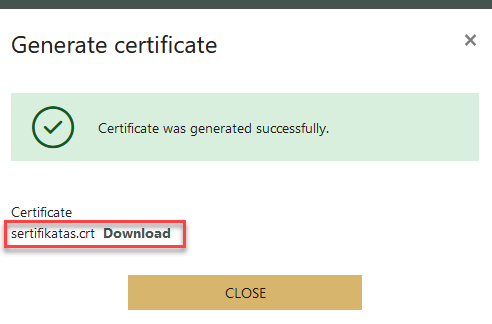
Picture 3. Downloading the CRT file
Note
The certificate can also be downloaded from the "Profile" certificate list by selecting the row of the certificate entry in the list and clicking the "Download" button. For more information see "Generating and adding a certificate after logging into the portal".
4. Catalogue content:
ls -ltotal 12-rwxrwxrwx 1 root root 1704 May 7 15:37 certificate.key-rwxrwxrwx 1 root root 980 May 7 15:37 request.csr-rwxrwxrwx 1 root root 1127 May 7 15:41 sertifikatas.crt5. Generate a PFX file from the certificate and key files.
openssl pkcs12 -export -out sertifikatas.pfx -inkey certificate.key -in sertifikatas.crtCreate a password that will protect the private key.
Enter Export Password: Verifying - Enter Export Password:6. Check available files:
ls -ltotal 16-rwxrwxrwx 1 root root 1704 May 7 15:37 certificate.key-rwxrwxrwx 1 root root 980 May 7 15:37 request.csr-rwxrwxrwx 1 root root 1127 May 7 15:41 sertifikatas.crt-rwxrwxrwx 1 root root 2389 May 7 15:43 sertifikatas.pfxsertifikatas.pfx - a file that contains your certificate and its private key.
7. Importing a certificate for use on a Linux system is configured in the browser. Open your browser settings, locate the "Privacy & Security" section, select "Certificates" option and click "View Certificates".
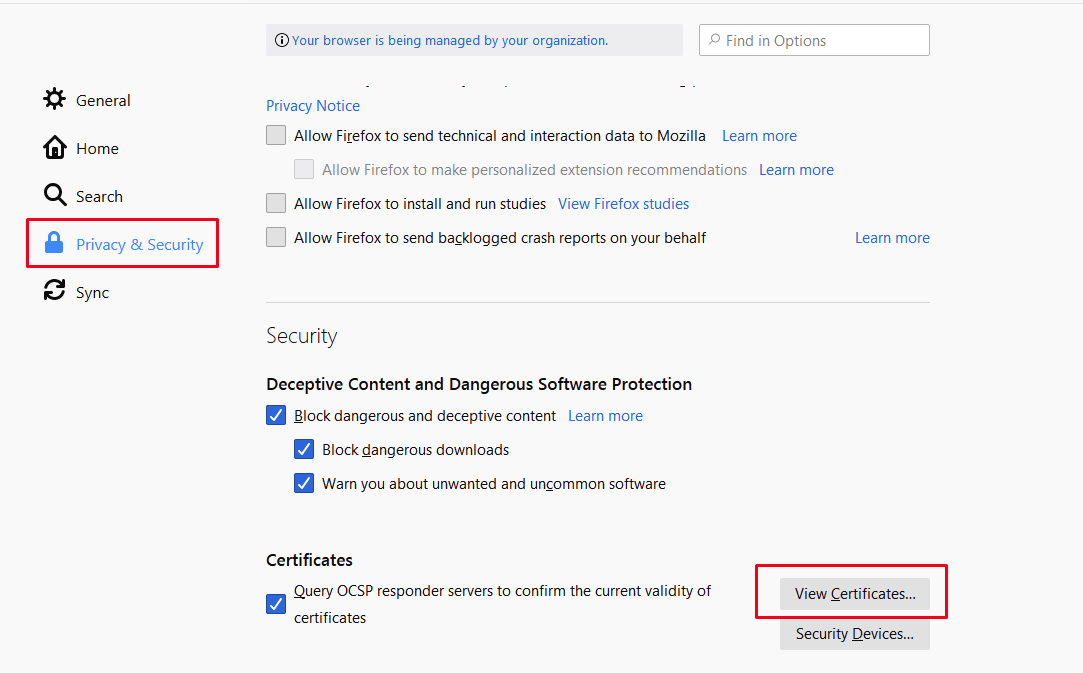
Picture 4. "View Certificates" tab
8. In an opened window in the "Your Certificates" section, click "Import", specify your PFX file and the password you specified in step 3.
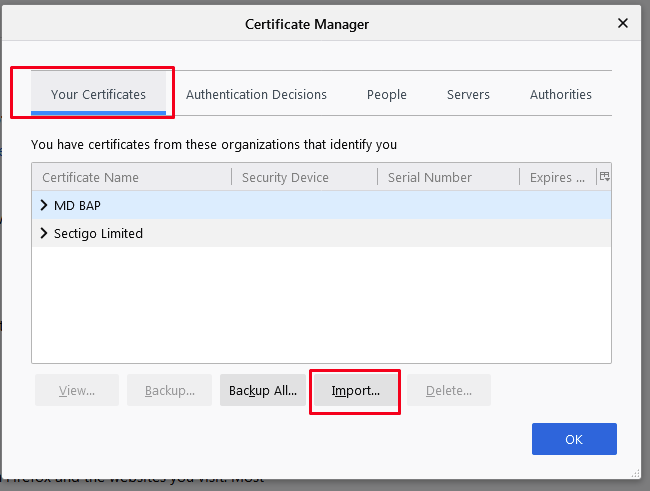
Picture 5. Certificate installation window
9. After the certificate has been uploaded successfully, you will see it in the list.
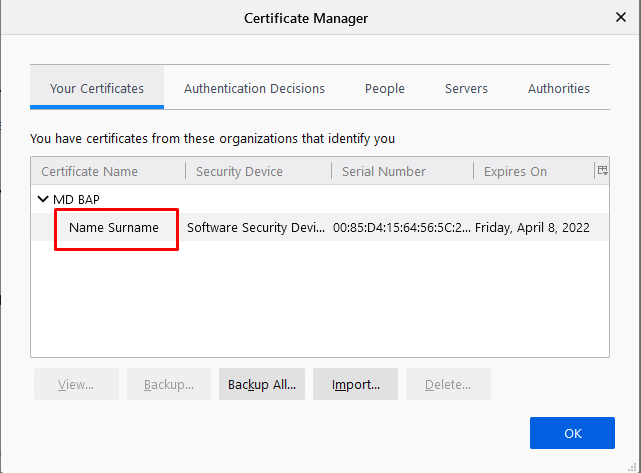
Picture 6. List of certificates
Preparing the certificate to work on another computer
To work on another computer, you need the PFX file that was generated in step 2 in the section "Download and install the certificate". Transfer this file to a new computer and continue with the steps in the installation instructions below.